Unit 9 - Contextual Studies and Learning 3D software
Introduction to Contextual Studies
For the very first lesson, I was absent due to factors that were completely out of my control. From what I could gather though, the class discussed the impact that video games have on society. They were then put into groups and brainstormed a couple things that they thought had an impact--either good or bad.
I was given an incomplete sheet, and my additions are in black.
Generally speaking, I think the impact is mostly positive--until it becomes an addiction where most positives are reversed.
06/09/2022 - Blender Learning / Experimentation
Today, we started looking at Blender (a free/open-source 3D computer graphics software) and learned the fundamental basics of the program.
First, I added the monkey/Suzanne mesh to the scene and toyed around with the Spin tool in edit mode.
I also messed with its materials a little bit. Honestly, I have no idea what I was going for--but it does look goofy.
Next, I added two cube meshes: one for a bevelled body and one mirrored for the arms and legs with their top four vertices stretched to make a rectangle.
The hat was done by adding a torus mesh and extruding these selected vertices upwards.
The top was then sealed off using the "add new face/edge from vertices" option.
Now I have a box guy.
While I already have quite an understanding of Blender, it doesn't mean I know how to make intricate models from absolute scratch (I'm not sure how many people do nowadays, considering the number of valuable add-ons that exist like Sapling Tree Gen or Archimesh, and CC0 assets that could be personally modified/edited).
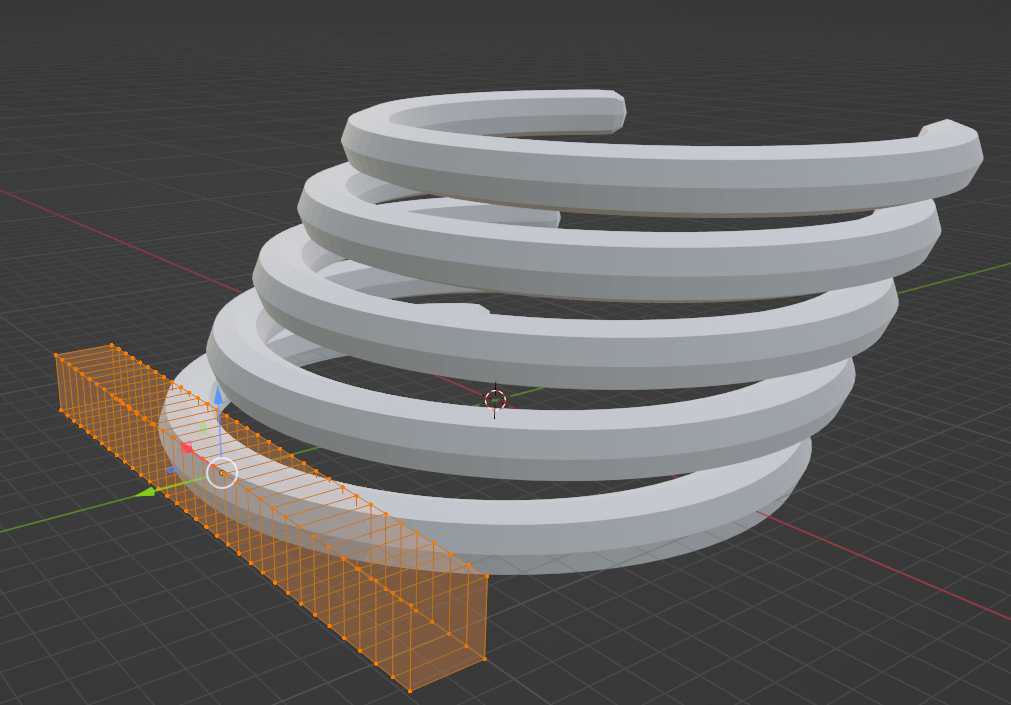
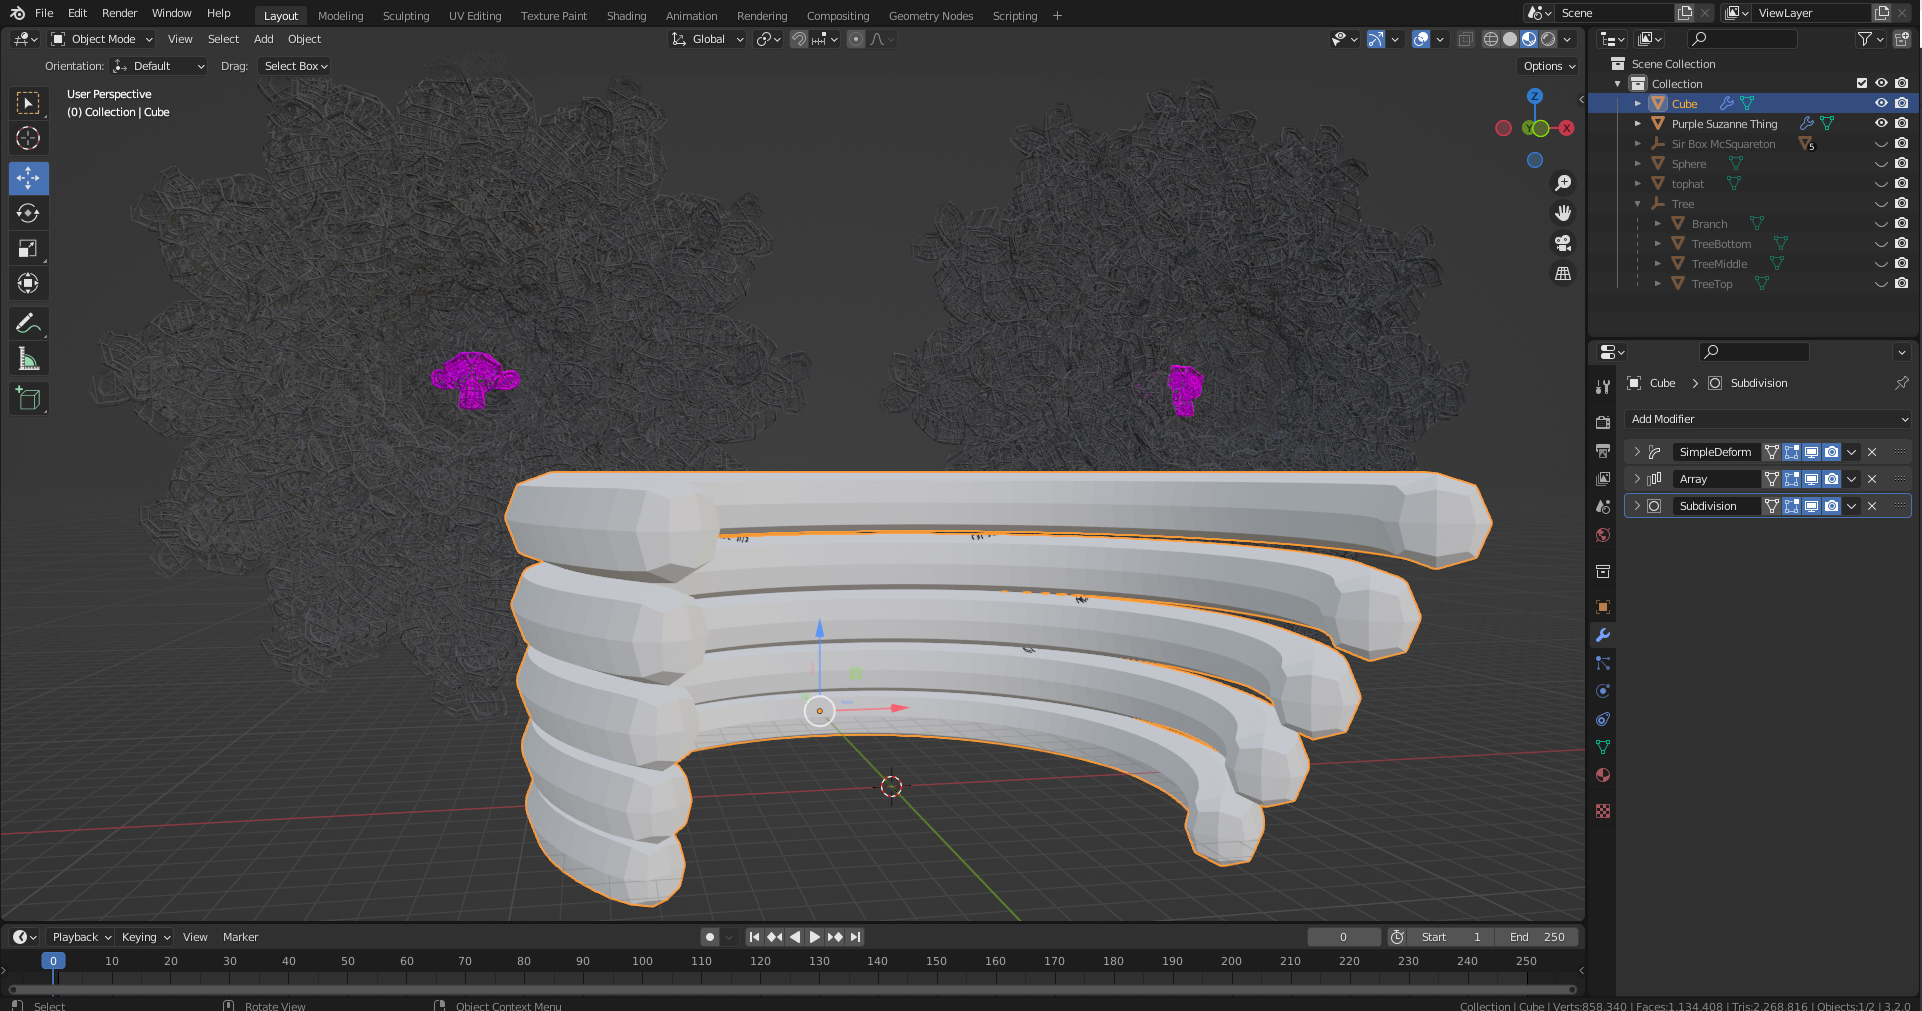
In the next Blender learning lesson, we toyed around with modifiers. They are mainly for automating tasks that would typically be monotonous.
Modifiers can be used to transform an object non-destructively--keeping its original geometry intact.
This is the result of adding SimpleDeform, Array, and Subdivision modifiers.
The deform gives it the bend, the array adds 4 copies of the mesh, and the subdivision is what makes it smoother/rounder.
Next, I added a Mirror and Wireframe modifier to the weird Suzanne mesh.
Both modifiers are self-explanatory.
Because the weird Suzanne mesh resembles an eye, I've accidentally created a horrifying face.
The wireframe modifier spikes the Tris count to 2 million, which is funny.
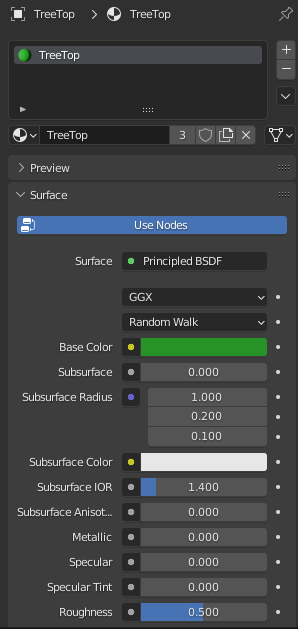
Next, we made a basic/low-poly tree.
The tree itself is made from 1 Cylinder and 3 Cone meshes--that's it. Only a few edits were made, like with the Cylinder's Radius/Depth and the Cone's scale.
The tree's materials are also incredibly basic--having only flat colours (and specular is set to 0 because I don't like it).
I initially stopped there, as it was fine until we went into UV/Texture mapping.
Because the tree bark is just a cylinder, UV-mapping the texture takes only a moment.
I went into the UV Editor tab, selected only the middle faces, and simply moved them down.
This was the only way I could successfully map the texture so it would seamlessly connect, but I imagine I could've also just used Cylinder Projection.
Overall, a fun, tree-filled lesson. This stuff is still within my current Blender knowledge, but I imagine that'll change very soon.
12/09/2022 - Geometry and Retopology
Today we learned about the types of polygons present in models and Topology, Dynamic Topology, and Retopology.
A Tri is a 3-sided polygon and is the bare minimum required to make a face.
A Quad/Quadrilateral is a 4-sided polygon.
They are generally the most preferred modeling due to several advantages, including better workflow, deformation, and loop-cut management. (Overall, they are easier to work with).
An N-Gon is any polygon that has more than 4 sides.
While there is nothing inherently wrong with N-Gons, they can cause some unwanted behavior if you don't know what you're doing. They subdivide poorly, and game engines usually triangulate any model you import regardless--which can cause issues.
Topology, on a basic level, refers to how a model is structured.
A simple example is the images of the cubes above: They all have different topologies but visually look like a basic cube. Ergo, it is essential to have a clean topology so it can deform and animate well.
If your mesh's Topology is unsatisfactory, you will likely have to go through a process called Retopology.
Retopology is optimizing a mesh's Topology, so it has a lower polycount and is cleaner and easier to work with. A typical example of a situation where Retopology would be applied is if you used sculpt mode to create a model (which can result in a tri/face count in the millions) and need to optimize it so it can be used practically, like in video games or animation.
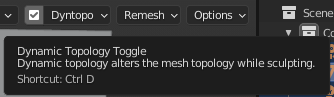
How can a model have a face count that high if sculpt mode usually only affects the Topology that the mesh already has? Simple: Dyntopo.
Dynamic Topology/Dyntopo is a method/option for sculpt mode that allows you to dynamically alter a mesh's typology when sculpting. This is particularly useful when you want to sculpt from a simple mesh like the basic cube, as it would typically result in nothing happening (as it has only 6 faces).
13/09/2022 - Figure Drawing (Male)
In this lesson, our task was to draw up a figure drawing/reference sheet for use in making a low-poly figure in Blender in the future.
We had a choice between a male figure, a female figure, and a child figure. I went the boring safe route and went with a male figure. For this, we followed Andrew Loomis's Ideal Proportions.
Sticking to the "ideal proportions" and the exact head units was quite a pain, as with any art I do, but I got it done.
Regardless, I think I followed Andrew Loomis's Ideal Proportions almost perfectly. I used Photoshop's Grid system in an attempt to line things up as close as I could.
The perfectionist in me hates this though, so I'll probably use the example sheet that was provided.
Bibliography:
Andrew Loomis / Uploaded by DFJustin. (1943). Figure Drawing for All It's Worth. [Online]. Internet Archive. Last Updated: 2011-12-08. Available at: https://archive.org/details/loomis_FIGURE_draw/page/n17/mode/2up [Accessed 10 November 2022].
15/09/2022 - Representation In Games Live Debate
As a panel member, answering the question, "Do video games fairly represent the demographics present in society?" and choosing a side is borderline impossible.
My own personal answer to the question was "It depends." because it really does depend--the question can't be answered in a black/white fashion. I don't consider a lack of representation to be automatically "unfair".
One issue that arose immediately is the Sonic characters in the first argument were mixed up: Tails is 8, not 12. Amy Rose is the one who was aged up, going from 8 to 12. Even then, I'm not sure if using Sonic characters was a good idea as I think they rarely act their age (aside from Cream the Rabbit). The fact that some characters like Amy have had character development despite not aging further does not help the argument (see: Amy in Sonic Heroes or Adventure vs Lost World or IDW Comics. She's a lot better later on).
Another argument I wasn't sure about was Xenoblade 2. The fact about some character designs being changed in an update is technically correct but leaves out some key details.
To be honest, I didn't even want to give either side my vote, but limiting my thought process to only include facts that were presented in the debate and the final argument on King's Diversity Space Tool and Corporate Pandering was enough to give it to the "Against" side.
15/09/2022 - Low Poly Figure
Over multiple days, we worked on making a low-poly 3D character model.
We start with a basic cube with a subdivision modifier and add a line cut in the middle to give it a circular shape.
Afterward, we then delete one side of the mesh and apply the subdivision modifier.
This is so we can add a mirror modifier.
Now that we have a mirror modifier, we only have to do half the work and not worry about having everything symmetrical on both sides.
Next, we added two images, a front and side view, of a figure drawing. This is so we have a visual indication of where to build our model/mesh.
Everything beyond this point essentially follows this guide 1-to-1, so I'm not writing down the whole process here (also, I'd go mad if I did).
Bibliography:
Single Sapling Games. (2019). Super Ultra Easy Low Poly Human In Blender 2.80 For Beginners. [Online]. Last Updated: Aug 9, 2019. Available at: https://www.youtube.com/watch?v=p1EI53ZVOgU [Accessed 15 September 2022].
In the end, this is what I ended up with.
The whole process of making the model was a mix of fun and pure hell. I kept focusing on trying to make everything look "perfect", which is impossible.
22/09/2022 - Comparing the 2D and 3D Gaming Experience
3D games have a third dimension. That's the key difference.
All things considered, similarities are far and few between. Similarities emerge if you were to play a 2D and 3D game from the same series, though.
From a technical standpoint, 2D and 3D games are fundamentally different in how they are created and played and essentially have no direct similarities between them. To keep it simple, here are some key differences a player would experience:
Control/Movement
2D: Because you have only 2 axes to work with in 2D games, movement is simpler and linear in the sense that you can only move left, right, up, and down. For example: In the original Super Mario Bros, you have a whopping two buttons to work with during gameplay. 'A' is for jumping and swimming, while 'B' is for running and throwing fireballs.
This means that 2D games are more suitable for people who do not commonly play video games, as the controls are generally much easier to understand (though not all the time, as is the case with fighting games and their complex inputs).
(Good luck hitting this)
3D: Giving the player a 3rd dimension increases the versatility of their movement by an indescribable amount. The type of movement a player can perform in a game like Mario Odyssey is nothing short of incredible.
This is double-edged, as despite a game like Mario Odyssey still having fairly easy-to-grasp controls, the sheer complexity of a 3D game can quickly overwhelm a beginner. (The game has Assist Mode for a reason)
Camera/Viewpoint
2D: The linearity of 2D movement is true for the camera too, and will typically view the game from the 'side'. Generally, your movement and the camera's movement are separate and will not directly influence each other like a 3D game would. 2D games will commonly use an effect named Parallax Scrolling, which creates a sense of depth by scrolling the background at a different speed.
3D: As the player gains a new dimension and incredible versatility, so too does the camera. 3D games and the camera controls are drastically different depending on where the camera is located, whether it'd be over the shoulder, above the player, or first-person. In most 3D games, the player and the camera are controlled separately, allowing viewing from numerous angles.
As Super Mario 64 was one of the first 3D games to have this type of camera control, the game introduces/attempts to explain the concept of the disconnected camera by physically having Lakitu act as the cameraman within the game's universe.
Visual Style
2D & 3D: Honestly, the number of dimensions a game has won't influence its visual style too much outside of subjectivity and technical limitations. 2D games aren't limited anymore and can sometimes look absolutely gorgeous--even better than some 3D games depending on who you ask. (Example: Hollow Knight)
This is further exemplified once you get into 2.5D games, as they can benefit from the visual upgrade that 3D games have, while still playing like a 2D one. The main type of visual style that matters is anything realistic/graphically intensive. If you want that sweet HDrealism/immersion, 3D is your only real option.
SwitchForce. (2017). Super Mario Odyssey - Exploring the Action Guide. [Online]. Youtube. Last Updated: Oct 27, 2017. Available at: https://www.youtube.com/watch?v=EUmdWfYdKk8 [Accessed 10 November 2022].
xRavenXP. (2021). [Longplay] N64 - Super Mario 64 [100%] (4K, 60FPS). [Online]. Youtube. Available at: https://www.youtube.com/watch?v=ze1vVOibGxo [Accessed 17 October 2022].
Before we can start on texture painting, we need to mark seams and unwrap our model. Marking seams tells the program to unwrap the model at the specific seams that we marked out.
UV unwrapping, simply put, "unfolds" the mesh and flattens it out. This allows us to reasonably texture our mesh.
Using some of the tackiest cc0 textures I found on Poly Haven that I then tinted purple in Photoshop, I got to work texture painting my purple guy.
Overall, this is a mess, but it's my mess. I can't wait to get this thing rigged.
Rigging will have to wait I guess because learning the Particle System is next up--specifically the Hair type. As hair particles are just a subset, I'll wait and explain what particles are once we get to using the Emitter.
There are numerous ways to add hair, but this is how we did it so the hair was separate from the low-poly model: First, we select some faces of the head and duplicate/separate them from the model to have a copy of some of the head. Next, we add a new particle system to our new mesh and switch the type to 'Hair'.
The result is this mess. Of course, we need the hair to actually look like hair, so we need to select the separated head mesh and go into Particle Edit mode.
Here, we can use the comb tool and some other tools to comb the hair to our liking. We can change the radius and strength of the tool, as well as some other useful settings.
After a long and grueling process of hair combing, we finally have something that kind of looks like hair.
Finally, I've learned what the Hair particle type is and how to use it. I'm more familiar with Emitter, the other particle type, so I'm excited about that.
Next up, we learned about the Emitter particle type, what it can do and what settings it has.
The Emitter works as you'd expect: it emits and produces particles.
Particles essentially consist of a lot of items. As you can see, this mesh with a particle emitter system will emit 1000 particles. They have a set start and end frame, as well as an adjustable lifetime.
The Particles' movement is affected by numerous things/factors and can be rendered in many different ways (in this case, a star mesh).
First, we start with adding a Plane, adding a particle system to the plane, and setting the particle type to "Emitter". Normally, the emitted particle is a basic round object, but we can change the Render options.
Conveniently, there is a built-in addon called "Extra Objects", which includes extra mesh objects that can be added--and one of them is a simple Star. Now, if I specify the instance object to be the newly added Star mesh, all the particles will look like that object.
Next, we looked at some of the other Emitter options. All of these should be self-explanatory, but ill still explain the Physics tab. "Multiply Mass with Size" means that the particle's mass is influenced by its size. This is useful if you are randomizing the particle sizes.
In Forces, Brownian essentially adds small random motion to the particles, while Drag reduces its velocity based on size and speed.
Now that I understand some of the settings, the next thing I did was create an absolute mess of particles--with 3 separate planes all emitting their own particles.
Another thing I did was give the floor Collision in the physics properties, which allows particles to interact with it instead of phasing right through it.
This was the end result. Praise the Purple Suzanne Idol, for they will bless us with fast renders.
Overall, this was a really fun lesson.
26/09/2022 - Low Poly Figure (Rigging using Rigify)
In this lesson, we finally begin the rigging process of our figure. Now that we have our low-poly figure prepped, it is time to rig the thing.
Before we do anything though, we need to enable the Rigify addon.
This can be done by opening up Preferences, going to Addons, and searching "Rigify".
Now we have some new Armature types to add. We went with Basic Human.
Well, would you look at that: our model is too big. That's no problem though, as we can simply scale it down and apply the scale.
Oh. The hair broke.
What follows is me spending approximately half an hour to an hour trying to properly scale the hair down. In the end, I never got it to work so now I need a backup plan.
The whole process I went through is very stupid, but here is the concise version: I convert the hair into a Mesh, then I convert the Mesh into a Curve which allows me to extrude it to give it actual depth, then I convert the Curve back into a Mesh and Symmetrize it so both sides of the hair are the same. Finally, I Convex Hull the Mesh. Now, I am left with this convex hull.
After editing it a bit by deleting some faces and adding a material to it, I now have a hood/cloak thing.
With the hair issue sorted, I can actually start the rigging process.
Obviously, the bones don't fully line up with our figure, so that is what is required next: We need to move and rotate the bones so they are inside the mesh. The process is a bit long and somewhat convoluted so I won't go over it. Just know that it involved moving the 3D cursor to the ends of bones and rotating from the 3D cursor.
Next, we just select the armature in object mode and hit "Generate Rig".
We're almost done, we just need to select both the body and the newly generated rig and set the parent to "Armature Deform With Automatic Weights"
Now the figure can be posed in pose mode!
Finally, the purple man is rigged and ready to go. I'm honestly surprised at how well this worked out.
I dread animating with this in the future though.
03/10/2022 - Research Assignment: Localisation & Censorship
Media Text #1 - Localization Changes: Kirby of the Stars / Kirby: Right Back at Ya!
Kirby of the Stars is a 2001 Japanese anime series based on
the Kirby franchise and produced by Studio Sign in collaboration with Nintendo
and HAL Laboratory.
The anime originally aired in Japan through Chubu-Nippon Broadcasting and ran
for one hundred episodes. In 2002, the show was licensed and dubbed into
English under the name “Kirby: Right Back at Ya!” by 4Kids Entertainment. The
English version aired on Fox Box/4Kids TV, a TV block that was part of Fox’s
network schedule.
In classic western localization fashion, “Kirby: Right Back
at Ya!” was greatly edited to remove or alter any content that was
“inappropriate” or “unfitting” for western audiences.
The severity of the dub’s plot, scene, and script differences vary drastically
from episode to episode: From minor dub changes like any references to death
being removed and Kirby no longer shouting the name of his Copy Ability to
more noticeable changes like Dedede’s Tank/Car having a different design because
it originally had military camouflage and the removal of entire scenes like in “A
Blockbuster Battle” which had one popular scene with Kirby wildly shooting a gun and
destroying the police station be omitted entirely.
(Left = Japanese Original / Right = English Dub)
Another major adaptation change is the opening, where the
original is much more cutesy, happy, and upbeat compared to the English opening,
which has an entirely different tone and goes all-in on the action and jazz.
(Left = Japanese Original / Right = English Dub)
In addition, the original Japanese
soundtrack was completely replaced by tracks locally produced by
4Kids—sometimes using tracks from other shows they’ve aired. This also has
quite a notable effect on the general tone of the show, as some of the original
tracks were remixes of existing Kirby songs.
As for why all these changes were made, I'm assuming it all has to do with 4Kids wanting Kirby to work with a young American audience. They likely thought that certain things like Dedede's tank having military camouflage or Kirby wielding an actual gun were too inappropriate for young viewers--while also attempting to cater to them by making Kirby (Both the show and himself) look more cool and action-packed by putting more emphasis on his essentially unlimited power. The dub's own title reflects this approach, as "Right Back at Ya!" not only sounds catchy, but it refers to Kirby's ability to copy abilities and use them back at the enemy. (This catering is also likely why American box art for Kirby games up until recently always had Kirby looking angry. These types of changes are what I'm referring to when I say "classic western localization").
Another notable difference in the dub is the order of some episodes.
For example, the episode “Cappy New Year” is the 29th episode in the dub, while it is the 13th episode in the original. This was done so the episode could be aired at the appropriate time in the west. A more egregious example is the original broadcasting of “Air-Ride-in-Style”, which was originally moved back from the 96th episode to the 50th. It had a release jump the size of nearly half of the entire show, going from near the show’s finale to the very middle just so it could coincide with the release of Kirby Air Ride.
Media Text #2 - Heavy Censorship: Wolfenstein 3D (SNES Port)
Wolfenstein 3D is a first-person shooter developed by id Software and originally released on May 5th, 1992, for MS-DOS.
Taking place in World War 2, you play as an allied spy who has been captured and must fight their way through Guards, Officers, Elite Guards, and Killer Dogs to escape a massive Nazi fortress named Castle Wolfenstein. Afterward, you are tasked with foiling a secret Nazi plan to create undead super-soldiers, aptly named ‘Mutants’, before finally moving on to assassinate Hitler himself.
Now take that entire synopsis and throw it out of the window--because that’s pretty much what the Super Nintendo Entertainment System (SNES) port did and is the main topic of this case study.
Id Software was approached and commissioned by Imagineer Co., Ltd., a Japanese software company, to port and publish Wolf-3D on the SNES.
The port’s development itself has its own interesting story and is mostly irrelevant to this topic but it’s worth noting that they were in “turbo crunch mode”, which included learning how to make a SNES game and create the port within three weeks.
The fact the game was being ported to the SNES is the main source of the censorship problems. To acquire a publishing license and legally release the game on the SNES, the game must follow Nintendo's own policies/guidelines.
Nintendo, being the strict child/family-friendly company that it is, was obviously not okay with the game as-is, with its Nazi imagery and blood/gore. Even then, this is one of the more egregious cases of typical Nintendo censorship.
Starting with the biggest change first: All Nazi imagery/symbolism is removed.
This is quite a problem, as the whole game takes place in Nazi Germany and is the game's most notable aspect.
Hitler is renamed to “Staatmeister” and he lost his moustache.
(Left = Original / Right = SNES)
On top of this, the enemies now speak English instead of German. As a result, the storyline is completely different as the original one would obviously not work.
At least this meant this version could be legally released in Germany, as they originally banned any game with Nazi imagery in it.
This change alone is already a big enough case of censorship, but we’re not done yet.
The second big change is the complete removal of blood and gore. Enemies now sweat(?) when hit and don’t leave a pool of blood on the floor after dying.
This change affects bosses the most, especially Hitler, as they now just fall over on the ground instead of melting into a bloody mess.
(Left = Original / Right = SNES)
Finally, the dogs are replaced with rats. An enemy being replaced entirely is quite a notable change, but the fact the change was made in the first place is more intriguing. Shooting dogs is a no-go, but shooting people (Ignoring the fact they're Nazis) and rats is fine? Sure, Nintendo.
The public response to the port, especially those who were fans of the original game, was mainly negative. Wolf-3d fans have had quite strong reactions to it, like calling the port a “Bastardized version”, the port being “Butchered beyond belief” and most commonly “awful”, just to name a few examples.
As a result of the censorship, as well as other technical issues related to the SNES simply not being that powerful, it is considered to be the worst version of the game.
World of Longplays. (2022). SNES Longplay [650] Wolfenstein 3D (US). [Online]. Youtube. Last Updated: Sep 13, 2022. Available at: https://www.youtube.com/watch?v=uAE9kKj3c6s [Accessed 13 October 2022].
VCDECIDE. (2015). Wolfenstein 3D (Snes vs 3DO) Side by Side Comparison. [Online]. Youtube. Last Updated: Dec 14, 2015. Available at: https://www.youtube.com/watch?v=S0jpq7D7u6k [Accessed 13 October 2022].
Hey, remember that box person I made at the beginning? I suspected we would do rigging in the future, which is why I made it so early on.
In fact, this little box fella will (likely) be the basis for my FMP in the future. Making a box with a top hat was one of my FMP concepts for year 1 before I learned it required a certain theme.
As we are doing this one bone by bone, we choose "Armature - Single Bone" instead of a basic Armature. If we then select our new singular bone and go into Edit Mode, we can add more single bones. We can then take these single bones and move/scale/rotate them to our liking to match our irregular-shaped character.
Thankfully we only have to do half the work, as we can simply Symmetrize the other half into existence, so long as we add a '.R' or '.L' suffix to our bone names.
Finally, we can do "Armature Deform With Automatic Weights" and rig our box-shaped friend.
Oh cool, the rig is borked.
As it (obviously) turns out, the arm/leg vertex groups are directly affecting the body because I did automatic weights. This is a problem for me, as I specifically need a lack of weight--the body and arms/legs needs to be separate and completely unaffected by each other.
Instead of relying on the Weight Paint mode, as I seemingly could never remove it all, I instead selected the offending faces and removed them from the vertex groups outright.
I added a few extra bones like one for the face and one for the top hat, just in case I need them in the future.
Now the body and arms/legs can move independently without affecting the body and vice versa, which means silly animations like this are possible.
Honestly, I did the best I could. Overall, I think the presentation went okay--It could've been worse.
Starting with my audience feedback, and one I almost always get when I present: I was talking too fast. I did realize it mid-way and slowed myself down, but it was a bit late for that. I also had a little too much information as well. "Too much, too fast."
One major mistake I made was missing the entire segment on advertising.
I skipped a whole section of my script without realizing it. I assume stress was getting to me, which caused me to make this mistake without noticing.
As to how I can improve in the future, I have some ideas, but I am uncertain if it will help. Speaking quickly and making mistakes in stressful scenarios like this seems to be nigh-unavoidable, but that's just me being pessimistic. As for the script, I should've printed out the script instead of reading it from my phone, which I will do next time.
To combat these issues for my next presentation, I will do at least one scripted rehearsal with a peer. This will allow me to familiarise myself with the script, gain feedback in real-time and maybe gain a little bit of confidence in the process.
11/10/2022 - 3D Animating (Walk & Jump Cycle)
Next up, it's time to make a neutral pose, a walking animation, and a jumping animation.
(I don't need to make a neutral pose, as I can re-use the first frame of the animation I made above)
Before we do anything, we need to go into pose mode and select all the bones, then press I and Insert LRS Keyframe. We can't animate if we don't keyframe it.
Now it's time to make a walk cycle. Thankfully there is a super-easy lazy way to make one with the auto-tweening and copying poses. First, we pose the first frame of the walk like so and copy the keyframe later on the timeline (In this case, 20 is copied to 40).
Then we select the frame that's in the middle of both keyframes (In my case here, frame 30), right-click and select "Paste Flipped".
Wow, would you look at that, we have the other end of the walk. Now if I specify to only play frames 20 to 40, it will result in a seamless walking animation.
It's a bit wonky, but it will do. Next up is the Jumping animation.
Quite simple really--the arms go up and the body moves down. The legs going into the body is 100% intentional and should hopefully look incredibly silly in practice.
20/10/2022 - 3D Animating (Film)
(Completed Film)
Next on our Blender to-do list is to make a film within Blender that involves an animated character walking into a house. The camera must also be animated. For this, I will use my box with a hat.
First is the house, which is literally just the box character but a house.
Yes, it's stupid, but the character is egotistical enough that he would have a house of himself.
The door's origin point was moved to its edge so it can be opened like an actual door late on.
Next, I added a textured plane that has been subdivided. This is so I can specify an area and make a vertex group that I can then tell a particle system to follow. This means I can generate trees/grass on it while leaving the house alone.
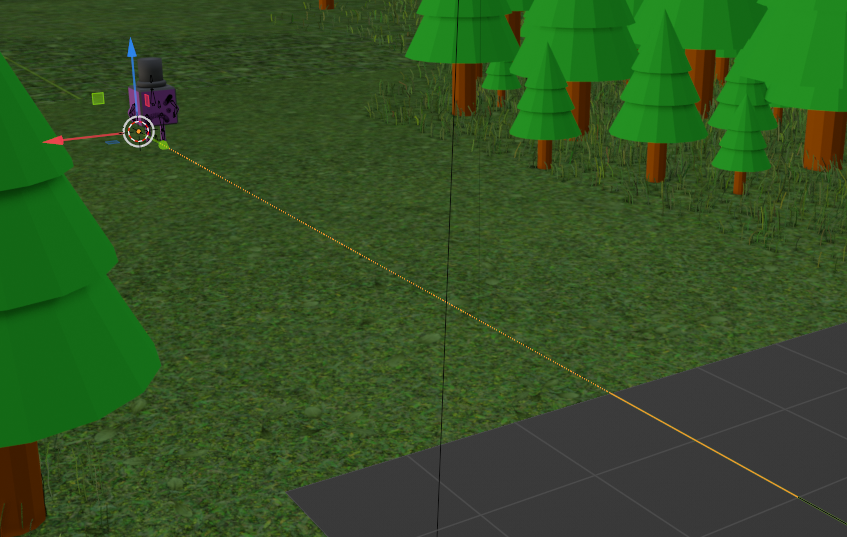
As you can see, I now have Trees and grass.
The trees were taken from the Blender Learning / Experimentation I did ages ago.
The grass also has altered forces, so they aren't perfectly straight.
For the walking, I just repeat keyframes across the timeline, until I reach the end where it transitions into the idle pose.
Of course, I still need him to actually move. So I added a Path Curve, increased its length, and told the armature to follow the path.
(This honestly took quite some time to get it working as intended.)
Now, I could finish here and be done with it, but I can't just leave it like this. One major thing that was bothering me was the empty space. The world just kinda cuts off.
The solution is simple--add more space. I added a second plane, extended it forward, and raised the edges of it just a tiny bit.
Now it's looking a lot better from this angle. The empty space is practically gone.
As a bonus, I added a sphere and point light to the top of the house to add to the scene's lighting.
As for the sky, it uses a texture that I made in Spacescape and put in an online tool to make it a Panorama (Sadly I forgot which online tool it was). Its Gamma and Hue/Saturation are then altered within Blender itself.
With that, the animation is finished.
I had a lot of fun with this lesson, even though I went a little overboard with the detailing.
On the plus side, I could potentially use this scene for my FMP.
03/11/2022 - Unity Learning (Kit Parts)
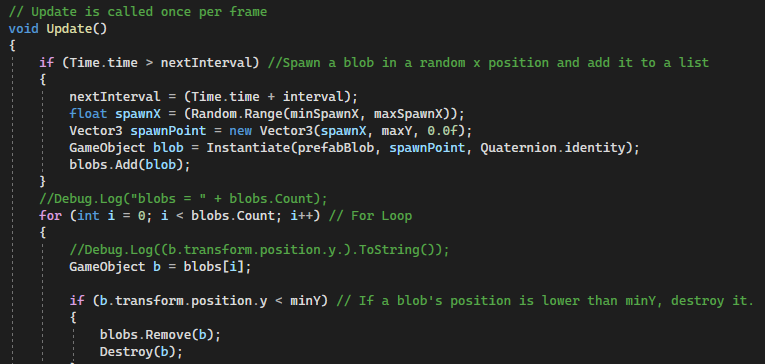
In this lesson, we started using Unity. The end goal is to make a little game where you must click enough blobs in a certain amount of time to win. I'm not going to go over all 3 scripts and what they do because I like my sanity. I will go over some important pieces, though.
This section of code is what controls the Blob spawning and destroying.
Instantiate is a function that is part of the 'Object' class, and is used to clone an existing object during runtime. The newly spawned object is then added to a list. This is so we can destroy specific objects in the list when they go off-screen.
After everything was tested and done, I decided to go back and improve the code a tiny bit.
First, I made the number of points a variable instead of a hardcoded number. This means I can now easily change the number of hits needed to win.
Next, I added an if statement to check to see if the clicked object is NOT already yellow. This stops someone from being able to click the same object multiple times.
Overall, a good start to Unity. I should've set the spawn timer really low and crash Unity when I had the chance.
From this point, any code required will not be created manually and instead be given to us, because otherwise we'd be stuck for weeks.
03/11/2022 - Unity Learning (Pusherman)
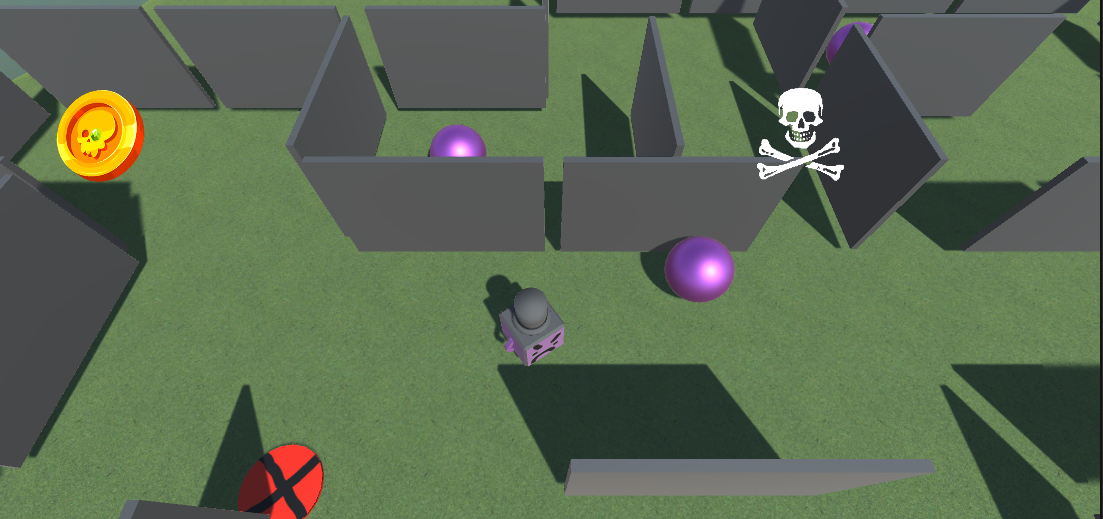
The next little game we made in Unity involved pushing balls through a maze into a goal. This is mainly so we could learn to import/use assets and control a third-person character.
The first thing we did is add a terrain, added a material to it, and paint trees on it.
Before doing anything, I checked the terrain's size using a standard character, and I could see that the terrain was incredibly big--way too big.
As to not waste any time, I only raised the edges of the terrain a bit. I could've experimented with the terrain tools more, but oh well.
After the terrain was completed, the next thing was to import our standard-asset player character into the scene. Sadly, the camera script is immensely basic and cannot be moved/turned in-game.
Just for fun, I imported by box character and replaced the standard-asset character. It has absolutely no animations set up, but that's fine for now--I suspect our next project will involve doing just that.
Next is to add the objects and walls. There is the white square, the purple spheres, the goal, and the (X) circle.
The white square transforms any purple cubes into spheres and also sends the player up into the air.
The purple spheres are what must be pushed onto the goal to score a point. Score three points to win.
(X) must be avoided. If a purple sphere touches it, you get a hit. Three hits and the game's over.
With that, this little unity game is finished. Honestly, my biggest issue seems to be my creativity. I can't seem to think of creative ways to use these objects.
14/11/2022 - Adding Character to Unity
We're not making a mini-game this time. Instead, in this lesson, we learned how to take the 3D character we previously created and animated in Blender and import it into Unity.
---
As a bonus, I imported the environment I made for the Blender Film/Animation into Unity.
Overall, this lesson got me feeling optimistic about my FMP plans. If I can make a running animation as well, I could skip a large majority of the character-creating and animating process in the future.
24/11/2022 - Unity Learning (Shooter)
The next mini-game project we made in Unity is a first-person shooter. This is for learning the basics for setting up an FPS, making animations within Unity, and generating a Nav Mesh.
The standard assets come with prototype prefabs to build with, so what we did first was build the environment to move around in. I designed mine to have numerous walls to peek behind and elevated places to gain a height advantage.
I didn't really think about what I was making thematically, but I seem to have made an industrialist-looking zone.
Next was to add an enemy and to generate a Nav Mesh.
We need to generate a navigation mesh so the enemy knows what is and isn't walkable after they are animated and scripted to move.
In the Navigation window, we can set parameters/limits for agent radius/height, step height, and slope angle. Putting it simply, it allows us to specify where the agent (in this case, the pink head) can and cannot go. Drop Height and Jump Distance OffMesh Links can also be generated: Drop Height allows an agent to drop down from a ledge and Jump Distance allows jumping across gaps.
The pink-tinted head was actually made using photogrammetry a few days ago, and I thought it would be amusing to make it the enemy.
(Idle Animation)
Animator Window
Enemy AI Scripts
After making the animations, connecting them up in the Animator, and adding the enemy scripts, the enemy can finally spot the player when they are close enough and give chase.
Now, we need a gun.
The Carbine is parented to the camera (which is parented to the player) and is positioned near the camera in such a way that it appears to the side in-game. It is then given a weapon script so it actually functions.
Next, I added two particle systems: 1 for the muzzle flash and 1 for the hit effect.
Next was to add UI for the crosshair and when the game is over.
Not much to say on this--what you see is what you get.
With that, the shooter game is now in a completed state.
As a little extra bonus, the default skybox was replaced with another material that has the skybox procedural shader.
Again, another fun Unity project. I'm sounding like a broken record now. I can't say the same for others though, as some other students ran into numerous technical problems. I'm lucky I got through this unscathed.
1/12/2022 - Controversies in the Video Games Industry (Presentation)
Feedback:
I'm surprised. Overall, the presentation went really well--for someone like me, at least. Me doing a test-run beforehand did actually seem to help with me talking too quickly.
As for the audience feedback, it's what I expected: Lack of body language/engagement and the jokes were overdone.
The lack of body language is an issue I'll probably not fix for a long while and I have no plan for it. The oddly placed joke of me calling McCree "funny high-noon man" is my 3am delirious-self losing his damn mind and future-me sucking it up by leaving it in. I do agree though, and I should've removed it. As for why it's in there at all: "It's high noon" is the most memorable quote by Cole Cassidy--probably one of the most memorable in the entire game (At least back in 2016).
As to how I can improve in the future, I honestly have no idea. Audience engagement is not something I can just snap my fingers and fix. I'd probably have to do a lot more presentations before I can comfortably do that. In terms of the general humor and tone of my presentations, it's staying. It's both a coping mechanism and a means for me to make the presentation more engaging. Sorry Tyler, the unprofessionalism stays.
05/12/2022 - Unity Learning (Waypoints)
Today, we made an object follow waypoints--yes, that's it. It's a lot more basic project compared to previous ones.
First, we added a sphere, gave it a tag named "waypoint", turned it into a prefab, and then laid a few out in a circle.
Next, we added an object (in this case, a tank) and gave it a "Waypoint Follow" script.
Now, we have a tank following a path laid out by some spheres. Quite simple, right?
Personally speaking, a super-small project like this is a nice change of pace from something like the Shooter game.
As a fun bonus, the main camera can be moved close to the tank and parented to it.
Unit 9 Evaluations
The aim of this unit was to develop and expand our knowledge/understanding of the characteristics and contexts in different forms of media, and to learn how to use both Blender and Unity.
Throughout the whole unit, I really enjoyed learning both Blender and Unity. For Blender, I found the particle system to be the most fun, being able to create an absolute mess of particles. As for Unity, it's the scripting and object components. As much as I absolutely despise coding, it's incredibly satisfying when it works out.
This leads into what I thought was the most difficult part of either piece of software: The scripting/coding. As I was already familiar with Blender and Unity, few things turned out to be notably difficult--I commonly had a lot of extra time to help the other students. Coding, on the other hand, is something I've had past troubles with (which I won't get into). I still find it difficult, and I am the lead engine for the Unit 10 project too. Being the backbone to a project and having to learn something I consider immensely difficult is quite the mental hit.
As for which software I'd like to progress with in the future, I'm honestly unsure--it's 50/50.
I'm not fond of making intricate or humanoid models in Blender, and there is no chance of me perusing coding.
I'm not confident in my abilities in either software to make a decision.
I haven't improved my practical drawing skills in the slightest. However, my design skills have evolved into what I can only describe as "simply unsimple". My design choices have been notably rudimentary. The purple box character is the culmination of this: I went with it because I would have extreme trouble with making an intricate, detailed humanoid character model from scratch. I considered the purple box to be a lazy approach--a cop out.
However, looking back, I never realized how much effort I put into putting both humor and personality into it--regardless of how "low-effort" the design is. The design choices I made were very deliberate and sometimes required extra effort to have it how I wanted: The body and arms/legs bones are separate and completely unaffected by each other, the legs going into the body in the jump animation because it looks funny, etc. Can my methodology be considered an "improvement" to my design skills? I couldn't tell you.
Out of all the contextual studies I've explored, I feel 'Legal and Ethical Constraints' is the one I learnt the most about. One thing that totally surprised me was learning the fact that PEGI has a unique icon/label for In-Game Purchases. Learning about the numerous regulating bodies was quite insightful too.
As for what study I felt like I was subpar in, I'd say it was 'Characteristics & Contexts'. The questions "How do video games impact society?" and "Do video games fairly represent demographics in society?" are so open-ended and opinion-based that trying to answer them gave me quite a headache. The questions can't be answered in a black/white fashion, and I don't consider a lack of representation to be automatically "unfair".
Even as a panel member, I could just not understand what I needed to research and note down because I genuinely believed it was unnecessary.
Taking from what I learnt from the contextual studies, I need to keep a lot more things into consideration for future projects. Plans for my FMP Game's ending have already changed to remove direct references to God and hell as a result of these studies.


No comments:
Post a Comment